
API keys are managed from the Nomadia Delivery Back-Office, under Configuration > Roles & Profiles > API keys.
Use the legacy API key
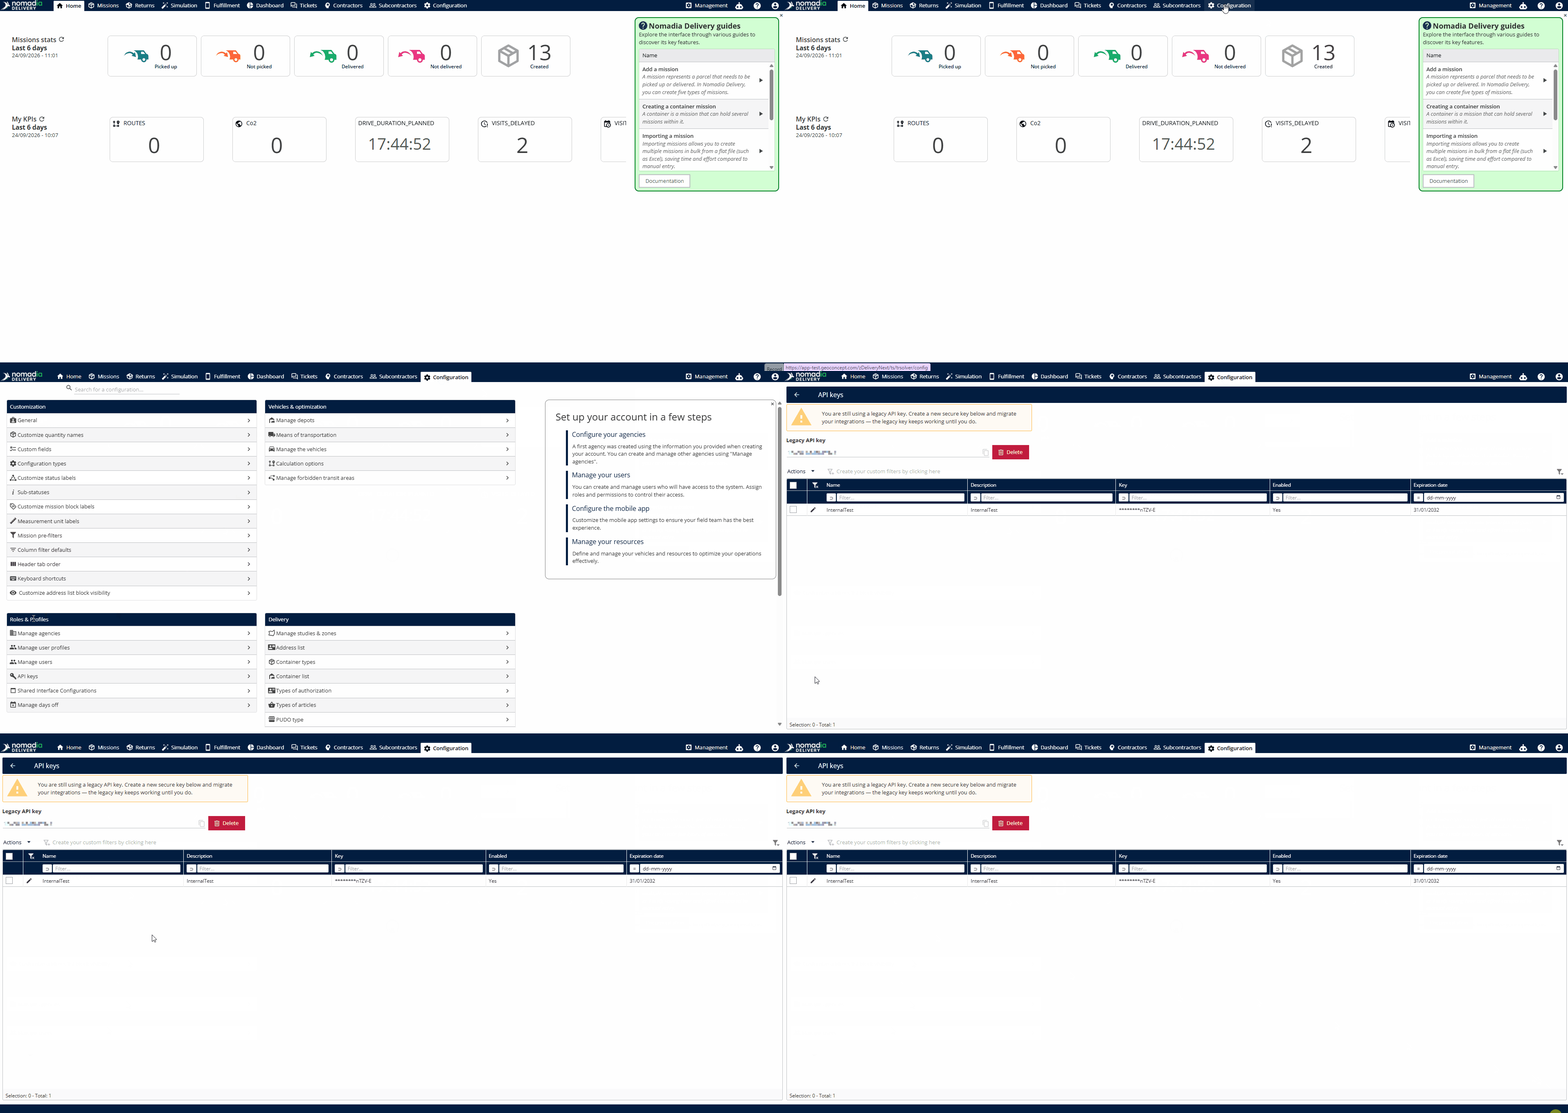
- Log in to the Nomadia Delivery Back-Office.
- Open the Configuration page.
- Under Roles & Profiles, click API keys.
- Find the legacy key in the list and click the Copy icon.
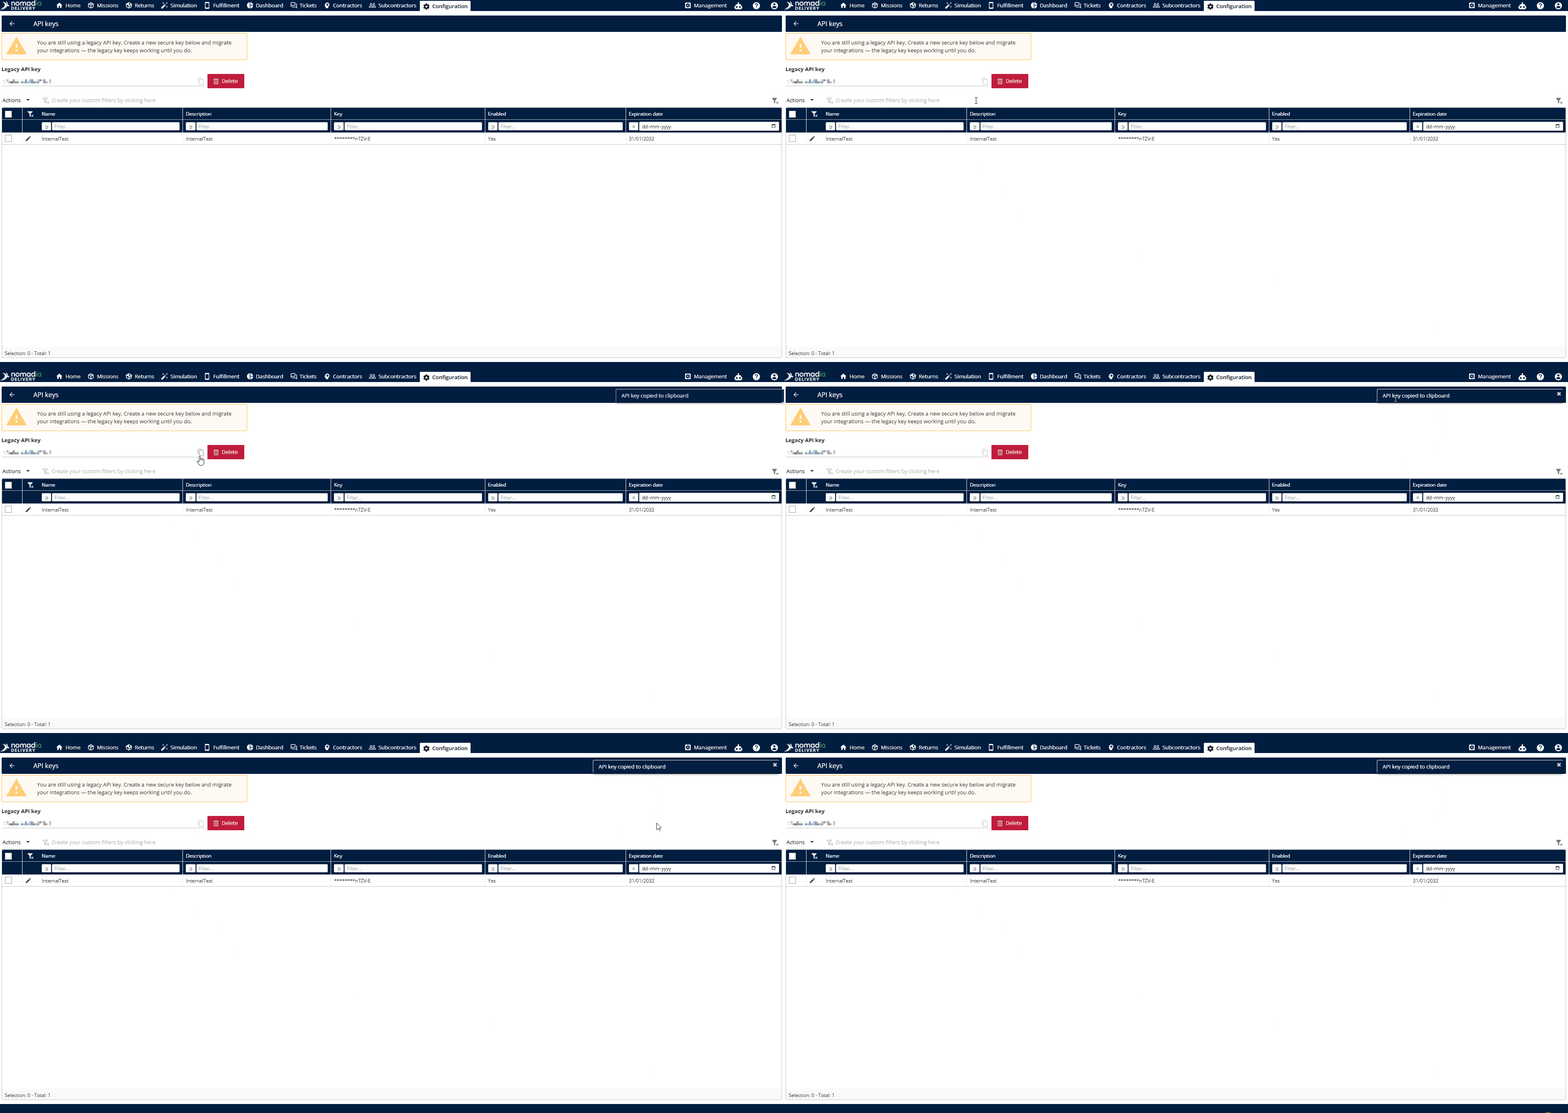
Note: The legacy key keeps working until you delete it. Your existing integrations won't be affected until then.
Recommended: For better security, create a new API key with an expiration date. Update your integrations to use the new key, then delete the legacy key.
Generate a new API key
- On the API keys page, click Actions > Add.
- Fill in the following:
- Name: must be unique.
- Description: what the key is for.
- Expiration date: the date the key stops working.
- Click Save.
- Copy the API key right away. It is shown only once.
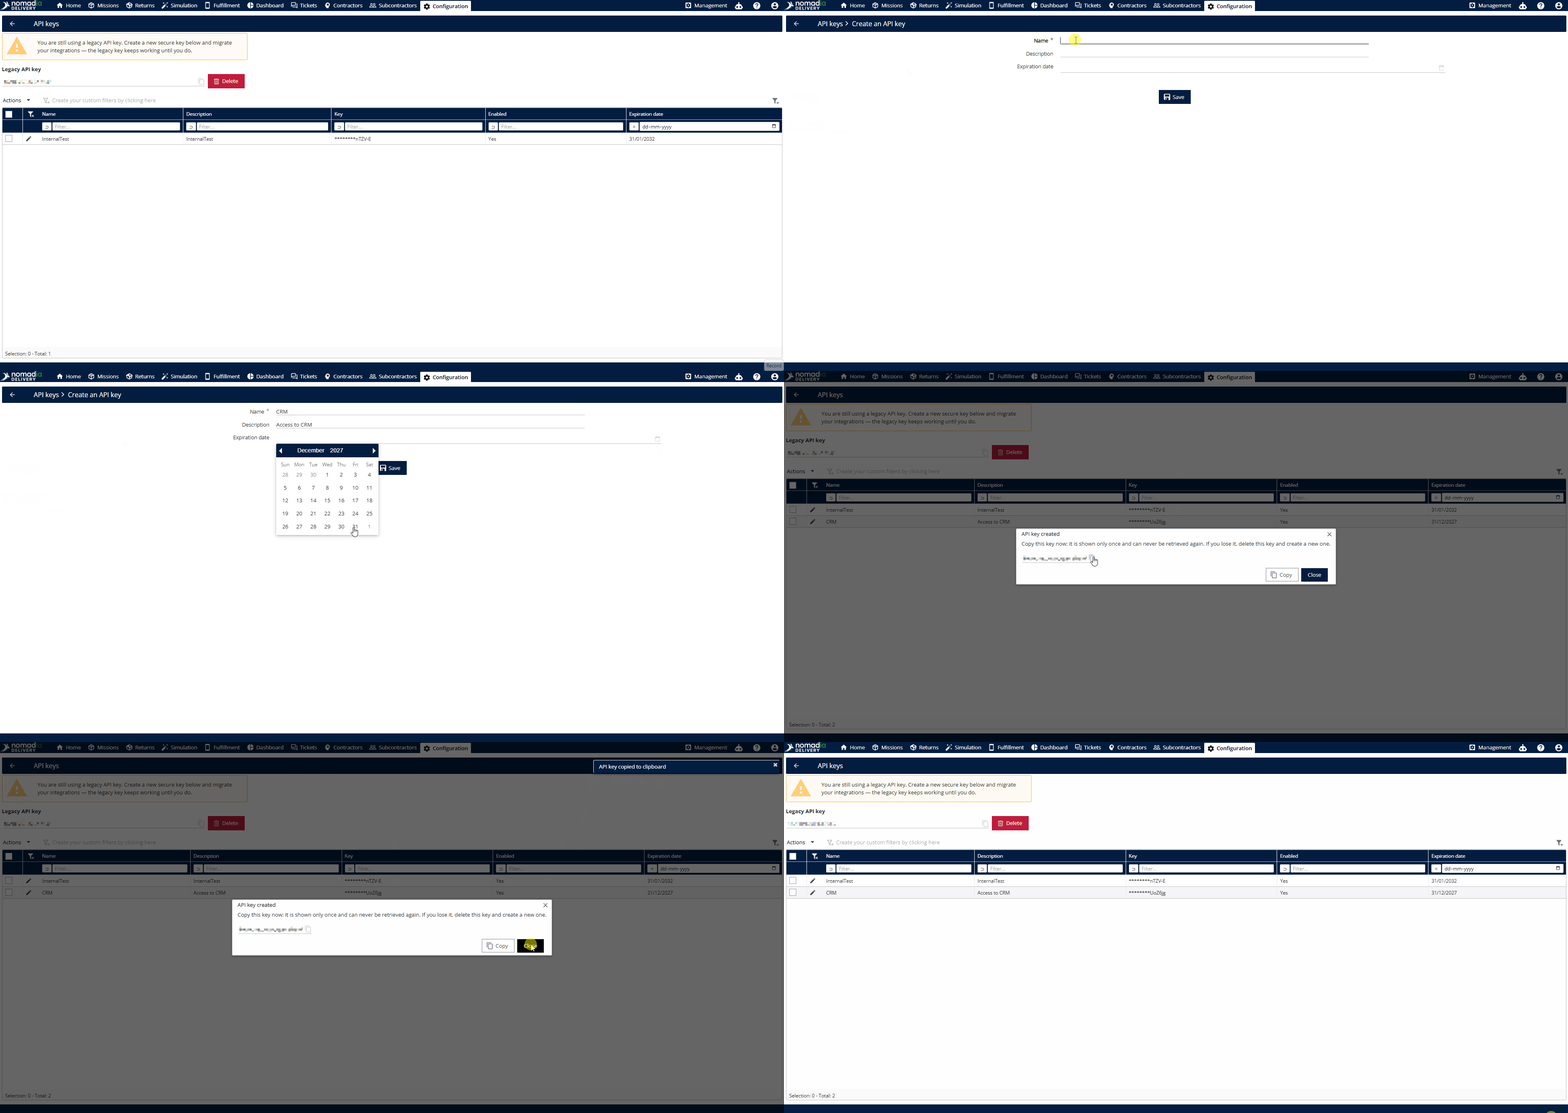
Important: You can't view or recover an API key in the interface after it's been created. If you lose one, generate a new key.
Good practices
- Use one key per use case. You can create as many API keys as you need, so each integration or application can have its own.
- Extend expiration dates before keys expire. This keeps your services running without interruption. To extend a key:
- On the API keys page, click the Edit (pencil) icon next to the key.
- Set a new Expiry date.
- Click Save.
- Disable a key instead of deleting it. If you need to pause a key for a while, disable it and enable it again later. While a key is disabled, requests that use it are rejected. You can only do this on a key that already exists, not while you're creating one. To enable or disable a key:
- On the API keys page, click the Edit (pencil) icon next to the key.
- Enable or disable the key.
- Click Save.